
 Skip to content
Off-Grid Power Planning
RV Solar Setup Decision Guide
Size solar from measured daily loads backward through battery capacity, realistic harvest, and inverter demand before buying a kit.
Quick answer
Size your RV solar system from your loads backward, never from the panel forward. The order is: what you run, how many watt-hours that costs per day, how much battery capacity you can actually use, how much solar input you can realistically harvest, and only then what inverter you need. Kits are sold by panel wattage because wattage is easy to advertise — it is the least useful number in the chain.
Disclosure: some links in this guide go to Amazon. Ticheka Outdoors is a participant in the Amazon Services LLC Associates Program. As an Amazon Associate I earn from qualifying purchases, at no extra cost to you. Affiliate links never change what we include, how we rank it, or what we say about it. See our affiliate disclosure and editorial policy.
This guide walks the five steps with arithmetic you can do on paper. It deliberately stops short of installation instructions: wiring, overcurrent protection, roof penetration and battery installation are work for a qualified RV technician or licensed electrician, for reasons explained at the end.
Step 1 — Audit your loads
List everything electrical you intend to run off shore power, and find each item’s actual draw. Do not use figures from an article, including this one. Use the appliance rating label, the manufacturer’s specification sheet, or a plug-in power meter. Two “identical” 12V compressor fridges can differ widely, and the gap compounds over a week.
For each item you need three columns: watts, hours per day, and whether it runs on 12V DC directly or through the inverter on 120V AC. That last column matters because inverting costs energy, and the loss is real overhead on your daily total.
Two categories catch beginners out. Cycling loads such as refrigerators run a duty cycle that changes with ambient temperature, so nameplate watts multiplied by 24 hours badly overstates consumption — use the manufacturer’s daily consumption figure if one exists. Phantom loads such as propane detectors, control boards and inverter idle draw are individually trivial but run continuously, and across 24 hours they are not.
Step 2 — Convert to daily watt-hours
For each item: watts × hours per day = watt-hours per day. Sum the column. That figure — daily watt-hours, or Wh/day — is the number the entire rest of the system is sized against.
Here is the arithmetic pattern, using placeholder figures purely to demonstrate the method. Replace every number with your own measured values.
| Load | Watts (from your label) | Hours/day | Wh/day |
|---|---|---|---|
| Example load A | 50 | 8 | 400 |
| Example load B | 15 | 5 | 75 |
| Example load C (continuous) | 2 | 24 | 48 |
| Example AC load through inverter | 100 | 2 | 200, plus conversion overhead |
| Daily total | — | — | Sum, then add an inverter-efficiency margin |
Add a margin for inverter efficiency and for high-usage days. Then decide how many consecutive days you want to survive with no meaningful sun. That multiplier is your autonomy target, and it drives battery sizing more than anything else.
Step 3 — Work out usable battery capacity
Battery capacity is advertised as nominal capacity. What you can actually take out without damaging the battery or triggering a protective cutoff is smaller, and how much smaller depends on chemistry.
| Consideration | Flooded lead-acid | AGM | Lithium iron phosphate (LiFePO4) |
|---|---|---|---|
| Typical rated depth of discharge | Conservative; manufacturers commonly rate cycle life against shallow discharge | Somewhat deeper than flooded | Substantially deeper; often near full nominal capacity |
| Practical consequence | You need considerably more nominal capacity than your daily Wh figure | Same direction, less severe | Nominal capacity is much closer to usable |
| Weight for equivalent usable capacity | Highest | High | Lowest |
| Cold-weather behavior | Capacity falls in cold | Capacity falls in cold | Charging below freezing is restricted; many units include protection |
| Where to get the real number | The manufacturer’s datasheet for your model. Ratings are not interchangeable across brands. | ||
The calculation: daily Wh × autonomy days ÷ your battery’s rated usable fraction = nominal capacity required. If your batteries are rated in amp-hours, convert using system voltage — amp-hours × nominal volts = watt-hours — and compare at the same voltage throughout.
This is where most undersized systems go wrong: people buy panels to fix a battery problem, then wonder why the system still dies overnight.
Step 4 — Estimate usable solar input
A panel’s rated wattage is measured under standard test conditions in a laboratory. On an RV roof you will not see it. Real harvest is reduced by flat mounting instead of tilt, by temperature, by cable and controller losses, by dust, and — most severely — by shade. Partial shading on one panel can cut output from an entire series string, which is why a branch over one roof corner can look like a system fault.
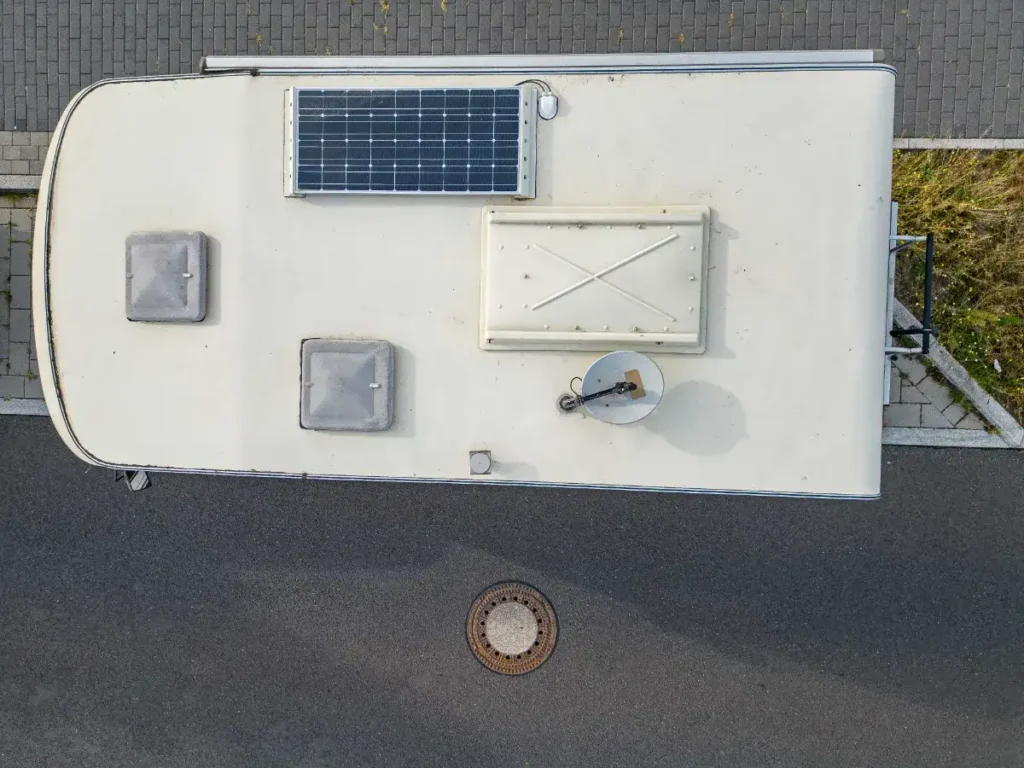
Estimate with a solar resource model rather than a rule of thumb. NREL’s PVWatts Calculator, a free tool from the U.S. Department of Energy’s National Renewable Energy Laboratory, estimates production for a given location, array size, tilt and orientation. Run it for the places and months you actually camp — a single “peak sun hours” figure hides the gap between a June desert stop and an October forest stop.
Three practical implications: site choice beats panel count, because moving to an unshaded site changes output more than adding a panel does; season sets the ceiling, so a system sized for summer will underperform in late autumn at the same latitude; and roof space rather than budget is often the binding constraint, so measure your usable area around vents, air conditioners and antennas before you shop.
Step 5 — Size the inverter
The inverter converts battery DC to household AC. Two numbers matter, and they are different numbers.
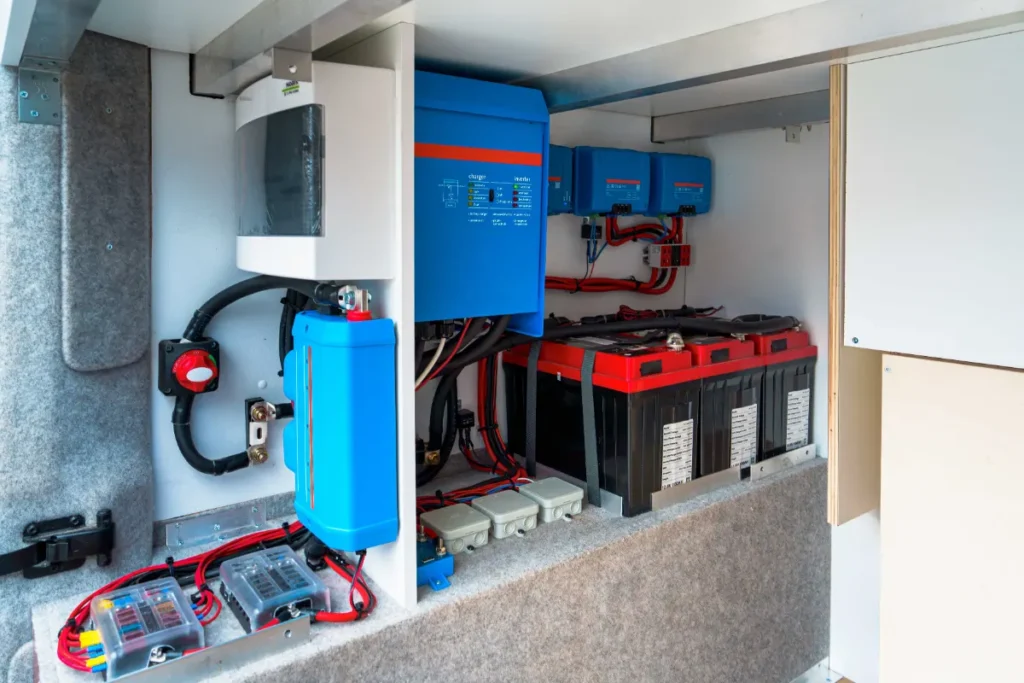
Continuous rating must exceed the total of everything you will run on AC simultaneously. Surge rating must cover the startup spike of motor-driven appliances, which briefly draw well above their running wattage. A device that runs at a modest continuous figure can demand several times that at the instant it starts.
The more important sizing question is what you should not run on an inverter at all. High-heat appliances — air conditioners, kettles, hair dryers, microwaves, induction cooktops, space heaters — convert electricity to heat, and heat is expensive in watt-hours. Most successful off-grid setups move those functions to propane or do without, rather than building a battery bank large enough to feed them. Oversizing is not free either: inverters draw idle current whenever switched on, which belongs in your Step 1 phantom-load column.
What a “1000 watt kit” delivers
Kits marketed as “solar panel kit with battery and inverter” bundle four components that must be matched to each other and to your loads: panels, charge controller, battery, inverter. Bundling is convenient. It does not mean the four are balanced for your use, and the panel figure on the box does not tell you what the system delivers.
Before buying any kit, check these five things against the numbers you produced above:
- Panel array fits your measured roof space, with clearance around vents and the air conditioner.
- Charge controller is matched to the array in voltage and current, with headroom rather than sitting at its limit.
- Included battery's usable capacity meets your Step 3 figure, rather than being a token inclusion.
- Inverter's continuous and surge ratings cover your actual AC loads — and check its idle draw.
- Battery chemistry matches the controller's charging profile. Lead-acid and lithium need different profiles.
If a kit fails on the battery — common, because batteries are the expensive component — price the battery separately rather than accepting the bundle's assumption about your autonomy needs.
Compare components
Once you have your numbers, these links open Amazon search results for each component class rather than a single product, so you can filter by the specification you calculated above. We do not quote prices, because Amazon pricing changes constantly — check the current listing.
- Roof and portable solar panels
- MPPT charge controllers
- Pure sine wave inverters
- LiFePO4 and AGM house batteries
- Battery monitors and shunts
These are affiliate links.
Where to stop and hire a technician
Everything above is planning arithmetic worth doing yourself — a technician cannot size a system without knowing your loads. Installation is a different matter.
RV electrical work in the United States sits under published safety standards. The RV Industry Association's adopted standards include NFPA 1192, the Standard for Recreational Vehicles, and ANSI/RVIA's standard for DC voltage systems in RVs, covering low-voltage systems and devices up to 60 volts nominal. NFPA 1192 in turn references NFPA 70, the National Electrical Code. Together they address conductor sizing, overcurrent protection, and the practices that prevent the most serious failure modes.
Have a qualified RV technician or licensed electrician handle roof penetrations and sealing, conductor sizing and routing, fusing and overcurrent protection, battery installation and ventilation, and any change to the vehicle's existing DC or AC distribution. Lithium retrofits in particular can interact badly with an original charging system designed for lead-acid, and getting that wrong is a fire risk rather than an inconvenience.
What you can safely do yourself: measure your loads, and read a battery monitor. Systems that improve over time are the ones whose owners can see the numbers.
Print this guide
This guide prints cleanly from any browser — no plugin, no download, no sign-up. Navigation, images and site links are hidden automatically in the printed version.
Frequently asked questions
How many watts of solar do I need for my RV?
The question cannot be answered without your daily watt-hour figure, your battery's usable capacity, and where and when you camp. Work through Steps 1 to 4 and the number falls out.
Can I run an air conditioner on solar?
Not on a typical rooftop array and battery bank for any meaningful duration. Air conditioning is a large continuous load with a substantial startup surge, and the capacity required is well beyond most RV installations. Plan for shore power, a generator, or shade and airflow instead.
Is lithium worth the extra cost?
Lithium's advantage is that far more of its nominal capacity is available for use, which often means fewer batteries and less weight for the same real-world autonomy. Whether that justifies the price depends on your Step 3 number and your rig's payload. Check your product's documentation for depth-of-discharge and temperature limits.
Do portable panels work better than roof-mounted ones?
They can, because they can be aimed at the sun and placed in a sunny spot while the rig sits in shade. The tradeoff is setup effort at every stop and the need to secure them. Many RVers run a roof array as the baseline and add a portable panel as a supplement.
Will solar change my rig's height or campground eligibility?
Roof-mounted equipment adds height, and height limits matter on some park roads and at some campgrounds. Re-measure after any roof installation — see how to measure your RV for campground limits.
What else should I plan alongside solar?
Water and waste capacity limit dry stays just as hard as power does — see the water tanks and dump stations guide and the boondocking rules for BLM and national forest land. If a satellite terminal is part of your setup, include its continuous draw in Step 1; the RV internet setup guide explains why it is the largest connectivity load. Trip sequencing is in the RV camping planning hub; pre-departure items are in the RV camping checklist.
Sources
- RV Industry Association — Association and ANSI Adopted Standards
- NFPA 1192 — Standard on Recreational Vehicles
- NREL PVWatts Calculator — U.S. Department of Energy
- U.S. Department of Energy — Solar Performance and Efficiency
- NFPA — Lithium-ion battery safety guidance
Specifications, depth-of-discharge ratings and temperature limits vary by product; use the manufacturer's documentation for your equipment. Standards editions are revised periodically. See data sources and methodology.