
 Skip to content
A complete RV camping checklist has two halves, and most guides only give you one. Packing is half the job; the sequence you follow at the site is the other half, and it causes most of the trouble. A forgotten spatula is an inconvenience. Unhitching before the wheels are chocked, plugging into an untested pedestal, or pulling away with the steps down is a different category of problem entirely.
Disclosure: some links in this guide go to Amazon. Ticheka Outdoors is a participant in the Amazon Services LLC Associates Program. As an Amazon Associate I earn from qualifying purchases, at no extra cost to you. Affiliate links never change what we include, how we rank it, or what we say about it. See our affiliate disclosure and editorial policy.
So this checklist is sequenced by time rather than by cupboard. It moves from trip fit and booking, through the 72-hour and 24-hour windows, departure morning, arrival and site setup in the correct order, utilities, food and water, family and pets, weather and emergencies, the daily camp rhythm, teardown, and a final ten-minute walk-around you can run from memory once you have done it three or four times. Each item is marked essential or optional, with separate notes for motorhomes, travel trailers and fifth wheels, and rental RVs.
Everything here is written to be printed, folded, and kept in the tow vehicle. Safety guidance is drawn from the National Park Service, NHTSA, the National Weather Service, and the USDA, and linked where it appears so you can check it yourself. Nothing on this page is a product recommendation.
Quick answer: the shortest version of this checklist
- Pack in four groups, not one big pile: drive and tow gear, hookup gear, kitchen and water, people and pets.
- Work in stages: 2–4 weeks out (booking and fit), 72 hours (systems), 24 hours (loading and weight), departure morning (hitch and secure), arrival (setup order), daily, and teardown.
- Never skip five things: cold tire pressure and tread, weight and hitch check, chocks before you unhitch, a water pressure regulator, and working smoke, carbon monoxide and LP detectors.
- Check the forecast and any park alerts the morning you leave, not the week before.
- Print the master checklist and run the ten-minute walk-around before every departure, including mid-trip stops.
How to use this checklist
Read it once end to end before your first trip of the season. After that, you only need three passes: the pre-trip pass, the arrival pass, and the departure pass. Most experienced RVers eventually compress the whole thing into two laminated cards — one for setup, one for teardown — and that is a reasonable goal.
Mark items as you go rather than trusting memory, especially at the end of a long drive day. Fatigue is when the sequence errors happen: the antenna left up, the water heater left on dry, the chocks left behind in the grass.
If you are new, resist the urge to buy everything before your first trip. Take the essentials, note what you actually reached for, and add slowly. Half the gear sold for RVing solves a problem you may never have.
Motorhome, trailer, or rental: what changes
The core checklist is the same for every rig. What differs is which steps get longer and which disappear.
| RV type | What it simplifies | What it adds | Watch closely |
|---|---|---|---|
| Class A / Class C motorhome | No hitching. Setup is mostly levelling, power and utilities. | Securing the interior for travel, engine-and-house battery management, and towed-vehicle setup if you flat-tow. | Overhead clearance, tail swing in tight campground loops, and everything stowed before you move even a few feet. |
| Travel trailer | You can unhitch and use the tow vehicle for groceries and day trips. | A full hitching and unhitching sequence, sway and weight distribution setup, and breakaway cable checks. | Tongue weight, chocks placed before unhitching, and coupler latch plus safety chains every single time. |
| Fifth wheel | More stable towing and usually easier backing than a bumper-pull. | Kingpin and jaw inspection, bed rail clearance checks, and taller overall height to track. | Height at gas station canopies and older bridges; landing gear on soft ground. |
| Rental RV or campervan | Maintenance and most gear come with the unit. | A documented walk-through, photo record of existing damage, and confirmation of what is actually included. | Ask directly which items are not supplied — sewer hose, drinking-water hose, levelling blocks, chocks and surge protection are common gaps. |
2–4 weeks out: trip fit and booking
Most bad RV trips are decided at the booking stage, when a rig is matched to a site that cannot really take it. Before you reserve anything, confirm the fit.
Confirm the rig fits the site
- Total length including tow vehicle or towed car, and the campground’s maximum length limit — these are often different numbers than the site listing implies.
- Height, including air conditioners and antennas, against any tunnels, canopies or low bridges on the route.
- Site type: back-in or pull-through, and whether the pad is level, gravel, dirt or paved.
- Hookup type: full hookup, water and electric only, or dry camping. Confirm amperage — 50A, 30A or 20A — because it determines whether you can run air conditioning.
- Generator hours, quiet hours, campfire status and pet rules.
Plan the route, not just the destination
- Map fuel stops you can actually enter and exit with a long rig. Truck-friendly stations are usually the safe choice.
- Note propane restrictions on certain tunnels and bridges.
- Estimate fuel cost early so the budget is not a surprise — our RV trip fuel calculator handles mixed towing and non-towing legs.
- Check elevation and grade. Long descents change your braking plan and, on some rigs, your engine and transmission temperatures.
Check conditions and regulations before you commit
The National Park Service advises researching your destination’s conditions, hazards and regulations before you go rather than on arrival, including seasonal closures and any food storage rules in bear country (NPS: camp safety before the trip). Rules vary meaningfully between parks, and a food storage violation can be both a fine and a genuine safety issue.
- Search available sites and hookup types with the Ticheka campground finder.
- Run a park alert check for closures, fire restrictions and road status if a national park is on the route.
- Confirm reservation dates, arrival window and check-in procedure for after-hours arrivals.
- Note the nearest hospital, urgent care and RV service center along the route.
72 hours before: systems and inspection
Three days out is the right time to find problems, because it leaves room to fix them. Doing this the night before is how small faults become canceled trips.
Tires and running gear (essential)
NHTSA’s TireWise guidance is that pressure should be checked when tires are cold — before driving or at least three hours after — and set to the vehicle manufacturer’s recommended pressure, not the maximum stamped on the sidewall. It also stresses checking tread depth and staying within the tire’s load rating (NHTSA: tires). RV tires often age out before they wear out, so treat the date code as seriously as the tread.
- Cold pressure on every tire, including the spare and the tow vehicle.
- Tread depth, sidewall cracking, bulges and uneven wear.
- Tire date codes; note the age of each tire.
- Lug nuts checked to the correct torque, especially after any recent wheel service.
- Trailer bearings and brakes serviced on schedule; brake controller responding.
House systems
- Test smoke, carbon monoxide and LP gas detectors, and replace batteries. Essential, non-negotiable.
- Fire extinguisher present, charged, in date and reachable from the door.
- Propane level in both tanks; valves and regulator free of corrosion.
- Run the refrigerator on both power sources and confirm it holds temperature.
- Water heater, furnace and air conditioning cycled and confirmed working.
- Water pump primed; check for leaks under sinks and around the pump.
- If you carry a generator, inspect and test it outdoors according to its manufacturer instructions; never run it in or near an enclosed space.
- Batteries fully charged; check water levels on flooded lead-acid batteries.
Structure and seals
- Roof seams, vents, skylight and antenna base inspected for cracked sealant.
- Slide-out seals cleaned and inspected; slides run in and out.
- Awning extended, inspected and retracted.
- All exterior lights, brake lights and turn signals confirmed with a helper.
- Windows, hatches and storage bay locks working.
Documents and admin
- Registration, insurance and roadside assistance details, in the vehicle and photographed on your phone.
- Reservation confirmations and any park passes.
- Offline maps downloaded for areas with weak coverage. If you need to stay genuinely online rather than just navigate, our guide to planning an RV internet setup compares what actually works away from town.
- Prescriptions refilled; first-aid kit restocked and in date.
- Someone at home told where you are going and when you expect to return, which NPS specifically recommends.
24 hours before: loading and weight
Weight is the quiet variable in RV safety. Overloading changes braking distance, handling and tire heat, and it is easy to do without noticing because everything you add is small.
Load in the right order
- Heavy items low and, in a travel trailer, forward of the axles — but not so far forward that tongue weight becomes excessive.
- Distribute weight side to side, not all in one storage bay.
- Secure anything that can slide. A cast-iron pan in a loose drawer becomes a projectile on a hard stop.
- Stay within your GVWR, axle ratings and the load rating of the tires themselves.
- Decide on fresh water. Water is roughly 8.3 pounds per gallon, so a full tank is a real load. Fill at the campground if you have full hookups; travel with a partial tank if your destination is dry.
Kitchen and galley
- Pre-cool the refrigerator and load it cold, not warm.
- Coolers packed with plenty of ice or frozen gel packs.
- Cookware, utensils, can opener, cutting board, knife, tongs, foil.
- Dish soap, sponge, dish tub, tea towels, trash bags.
- Coffee setup, since it is the most reliably missed item in the galley.
- Matches or lighter, and a backup.
Final night tasks
- Dump and rinse holding tanks so you leave with them empty.
- Charge phones, headlamps, lanterns, power banks and camera batteries.
- Fuel the tow vehicle or motorhome.
- Set out the ten-minute walk-around card where you will see it in the morning.
Departure morning: hitch, tow and secure
This is the highest-consequence sequence in the whole checklist, and the one most worth doing the same way every time.
Secure the interior (all rigs)
- Refrigerator door latched; loose items off counters.
- Cabinets, drawers and bathroom door latched.
- Roof vents and skylight closed; windows closed and latched.
- TV and antenna down; slides fully in.
- Set propane appliances and cylinder valves for travel according to the RV, appliance and cylinder manufacturer instructions, plus route-specific rules.
- Water pump and water heater off; steps retracted.
Hitching a travel trailer (in order)
- Chocks stay in place until the trailer is fully coupled.
- Back the tow vehicle until the ball is under the coupler.
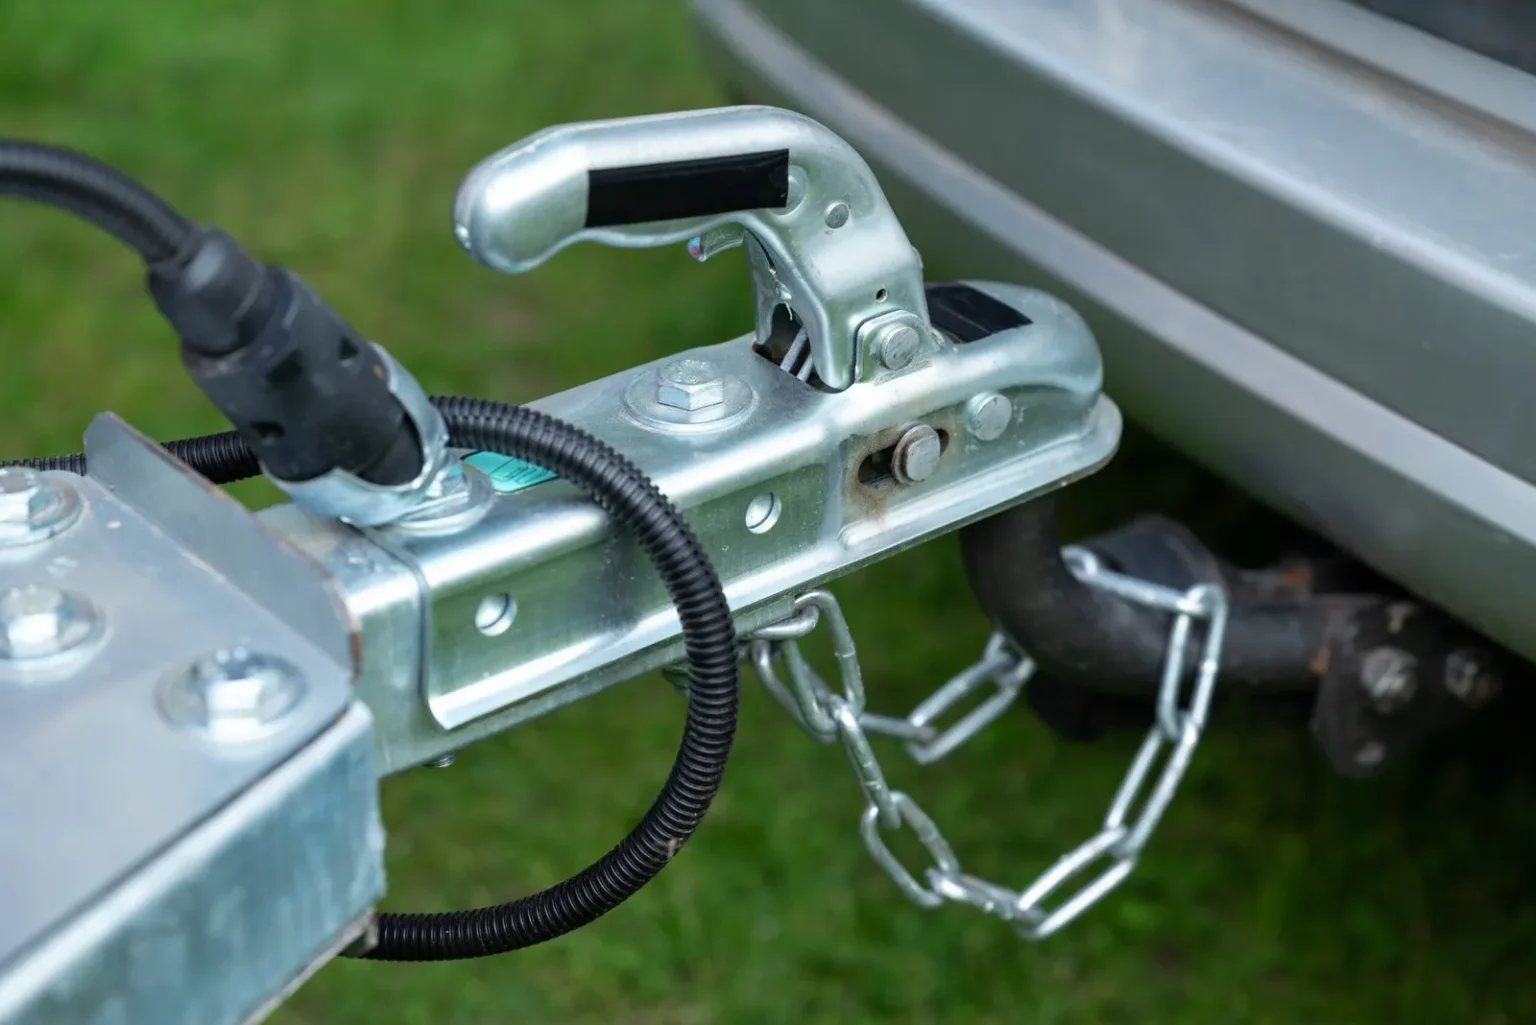
- Lower the coupler onto the ball and latch it, then insert the latch pin or lock.
- Fit weight distribution bars and sway control to your setup’s specification.
- Cross the safety chains under the coupler and connect them with enough slack to turn.
- Connect the breakaway cable to the vehicle frame — never to the ball or the chains.
- Connect the seven-way electrical plug and confirm brake lights, running lights and turn signals with a helper.
- Raise the tongue jack fully and remove and stow the chocks.
- Test the trailer brakes manually with the controller at low speed before leaving the site.
Fifth wheel additions
- Confirm the jaws are fully closed around the kingpin and the handle is locked and pinned.
- Do a visual pull test at idle against the closed jaws before raising the landing gear.
- Check bed rail and cab clearance at full turn angle.
Motorhome and towed vehicle
- Tow bar, base plate, safety cables and lighting connected and tested.
- Towed vehicle in the correct transmission and steering configuration for flat towing.
- Mirrors adjusted; backup camera working.
- Levelling jacks fully retracted, confirmed visually rather than by indicator light alone.
Arrival: site setup in the right order
Doing setup in the wrong order is what causes most of the small damage at campgrounds. This sequence works for nearly every rig.
- Walk the site first. Look for low branches, stumps, soft ground, fire ring position and where the hookups actually are. NPS guidance on choosing a site notes checking overhead for dead or hanging branches and avoiding low-lying ground that collects water (NPS: finding and setting up a campsite).
- Decide your position based on hookup reach, door swing, awning space and where the sun will be in the afternoon.
- Back in with a spotter using agreed hand signals. Stop and get out whenever you are unsure. Nobody has ever regretted stopping to look.
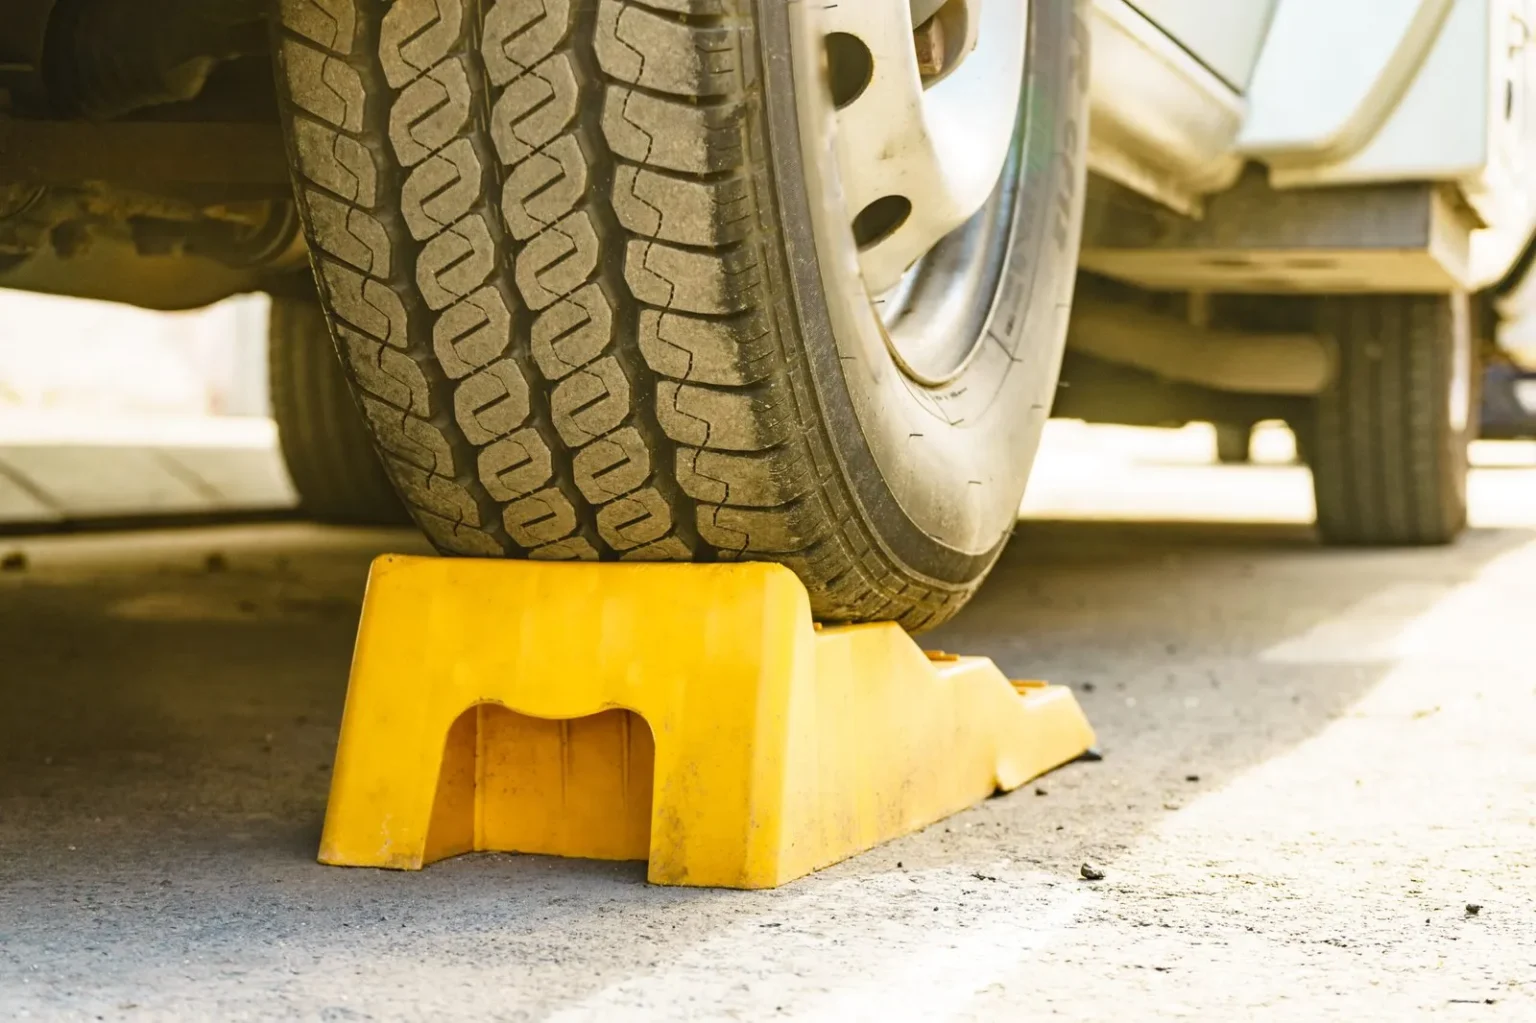
- Level side to side first using blocks or ramps under the tires, before anything else touches the ground.
- Chock the wheels. On a trailer, this comes before unhitching, always.
- Unhitch and move the tow vehicle out of the way, or on a motorhome, disconnect the towed vehicle.
- Level front to back with the tongue jack or levelling system.
- Lower stabilizers. Stabilizers steady the rig; they do not lift or level it.
- Connect utilities in the order below.
- Extend slides, checking clearance above and beside them.
- Open the awning only if wind is calm, and retract it any time you leave the site or before a storm.
- Set up the outside: mat, chairs, table, lighting, and a plan for where trash goes overnight.
Utilities: electric, water, sewer
Electric (in this order)
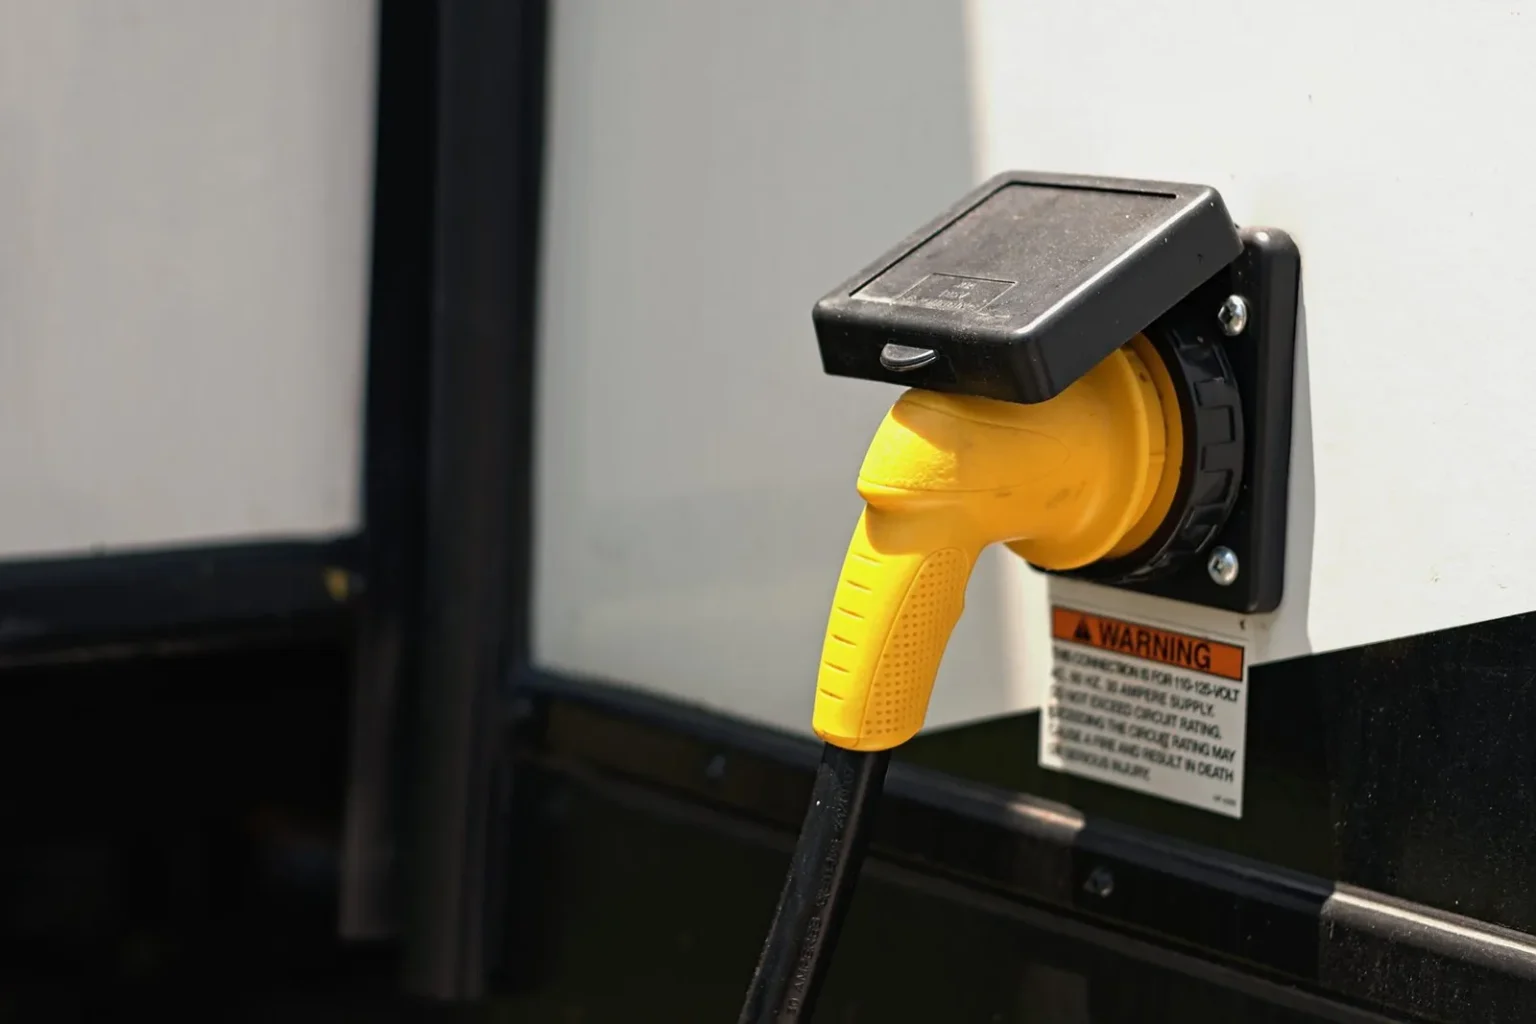
- Turn the pedestal breaker off before touching anything.
- Test the pedestal with a surge protector or polarity tester. Faulty campground pedestals are common enough to justify this every time.
- Plug in the surge protector, then the shore power cord.
- Turn the breaker on.
- Keep the cord off walkways and out of standing water.
Fresh water
- Use a water pressure regulator — essential. Campground pressure can exceed what RV plumbing is built for, and a burst line inside a wall is an expensive lesson.
- Use a white or blue potable-water hose only, never the same hose used for tank rinsing.
- Add an inline filter if you want it; it is optional and mostly about taste and sediment.
- If water quality is uncertain, treat it as unsafe for drinking and use bottled or filtered water for consumption.
Sewer
- Wear disposable gloves. Keep a dedicated set of tools that never touch anything else.
- Connect the hose to the RV first, then to the campground inlet, and support it so it slopes downhill continuously.
- Keep the black tank valve closed until the tank is at least two-thirds full, then dump black first and gray second so the gray water rinses the hose.
- Rinse and stow the hose in a bay that holds nothing else.
- Wash hands thoroughly afterwards, regardless of gloves.
Food, water and cooking safety
Camping food safety is mostly about temperature and separation. USDA guidance for hiking and camping is to keep cold food at 40 °F or below, keep raw meat sealed and separated from ready-to-eat food, and cook to safe internal temperatures measured with a food thermometer — 145 °F with a three-minute rest for whole cuts of beef, pork and lamb, 160 °F for ground meats, and 165 °F for all poultry (USDA FSIS: food safety while hiking and camping). The same guidance limits perishable food left out to two hours, dropping to one hour when the temperature is above 90 °F.
Food checklist
- Food thermometer — essential, and one of the most commonly skipped items.
- Cooler with ice or frozen packs, packed full; a full cooler holds temperature longer than a half-empty one.
- Separate cutting boards or a clear system for raw and ready-to-eat.
- Hand soap and water, or hand sanitiser when water is limited.
- Sealable containers for leftovers, and a plan to chill them promptly.
- Food storage that meets the park's rules, which in bear country usually means a hard-sided vehicle or a provided locker rather than the RV's exterior bays.
Water
- Drinking water for the full stay if the campground source is untreated or unavailable.
- A rough plan for consumption if you are dry camping, including dish washing and showers.
- Gray tank capacity checked against how long you intend to stay.
Family, kids and pets
Kids
- Agree the site boundary out loud on arrival and walk it together.
- Give each child a whistle and a simple rule: stay put and blow it if lost.
- Write the campsite number and a phone number somewhere they can find it.
- Headlamp each, so nobody is navigating the dark with a phone screen.
- Rainy-day plan: cards, books, downloaded shows. Weather will eventually decide a day for you.
Pets
- Vaccination records and a recent photo on your phone.
- Leash, tie-out and shade. Confirm the campground's leash and unattended-pet rules before booking.
- Food, bowls, medication and waste bags.
- Never leave a pet in a closed RV relying on air conditioning without a temperature monitor and a backup power plan.
- Identify the nearest emergency vet before you need one.
Weather and emergencies
Campgrounds are exposed places, and RVs are not storm shelters. The National Weather Service advises knowing the forecast before you go, identifying the nearest sturdy shelter on arrival, and moving to a substantial building or a hard-topped vehicle at the first sound of thunder — tents, picnic shelters and open-sided structures do not protect you (NWS: campground weather safety). The same guidance warns against camping in low-lying areas and dry washes where flash flooding can occur.
Weather and emergency checklist
- NOAA weather radio or a phone with emergency alerts enabled — essential in areas with poor coverage.
- On arrival, identify the campground's designated shelter or the nearest solid building, and tell everyone where it is.
- Awning retracted whenever wind is forecast or you leave the site.
- First-aid kit, plus any personal medications in their original packaging.
- Headlamps, spare batteries and a backup light source.
- Basic tool kit, duct tape, spare fuses, and the correct lug wrench for your wheels.
- Roadside assistance number saved and written down.
- Reflective triangles or flares for a roadside breakdown.
- Paper map as a backup when the phone has no signal.
The daily camp routine
Once you are set up, a short repeatable routine prevents most mid-trip problems.
Morning
- Check the weather for the day and adjust plans early rather than at noon.
- Check tank levels: fresh, gray, black.
- Check battery state of charge if you are dry camping.
- Look under the rig for leaks or drips.
Evening
- Bring in or secure anything that will blow away or attract wildlife.
- Store food per the park's rules, not per habit.
- Extinguish the campfire completely — cold to the touch, not just dark.
- Retract the awning if any wind is forecast overnight.
- Lock exterior bays and the door.
Teardown and departure
Teardown is arrival in reverse, and the reversal is what makes it easy to remember.
- Inside first: dishes away, counters clear, refrigerator latched, cabinets and drawers latched, bathroom door secured.
- Retract the awning and clean and dry it if you can — a wet awning rolled up for a week will grow mould.
- Bring in outdoor gear, mat, chairs, lights and clotheslines.
- Disconnect sewer: dump black, then gray, rinse, stow.
- Disconnect water: drain the hose, stow the regulator and filter.
- Disconnect electric: pedestal breaker off first, then unplug, then stow the cord and surge protector.
- Bring slides in, checking clearance as they move.
- Raise stabilizers.
- Hitch up following the departure sequence above, chocks last.
- Raise the tongue jack or landing gear fully; retract the steps.
- Confirm lights and brakes with a helper.
- Walk the site for anything left behind, and leave it cleaner than you found it.
The last ten-minute walk-around
Run this from the driver's door, walking a full circle around the rig, every time you move — including gas stations and overnight stops.
- Steps up and retracted.
- All bay doors closed and latched.
- Power cord, water hose and sewer hose disconnected and stowed.
- Awning retracted and locked.
- Antenna and satellite down.
- Slides fully in.
- Jacks and stabilizers fully up.
- Chocks and levelling blocks collected — check under and behind the wheels.
- Hitch latched, pinned, chains crossed, breakaway cable attached to the frame.
- Lights and brakes confirmed; nothing left on the picnic table.
Essential versus optional
Not everything sold as an RV necessity is one. Here is a practical split of the items people most often ask about.
Item names in the table link to Amazon search results, not to a single product, so you can compare current options and prices yourself. These are affiliate links.
| Item | Verdict | Why |
|---|---|---|
| Water pressure regulator | Essential | Helps keep incoming pressure within the range specified by your RV manufacturer. |
| Wheel chocks | Essential | The single most important item in the unhitching sequence. |
| Surge protector or pedestal tester | Essential | Helps identify certain pedestal faults before you connect; follow the device instructions and campground guidance. |
| Levelling blocks | Essential | Few sites are level, and refrigerators and doors both care. |
| Food thermometer | Essential | USDA safe cooking temperatures cannot be judged by eye. |
| Torque wrench | Essential if you tow | Lug nut torque matters after any wheel service. |
| Inline water filter | Optional | Improves taste and catches sediment; does not replace safe water sourcing. |
| Tank treatment chemicals | Optional | Odour management; good tank habits matter more. |
| Outdoor rug and lighting | Optional | Comfort and dirt control, not function. |
| Portable waste tank | Optional | Only useful if you regularly stay at sites without sewer for long periods. |
| Backup camera (aftermarket) | Optional but high value | Reduces the most common and most expensive campground mistakes. |
Print this checklist
The checklist prints cleanly from any browser — no plugin, no download, no sign-up. Navigation and links are hidden automatically in the printed version.
Frequently asked questions
What is the 3-3-3 rule for RV camping?
The 3-3-3 rule is an informal travel guideline used by many RVers — not a government or safety standard. It suggests driving no more than about 300 miles in a day, arriving at your site by around 3 p.m., and staying at least three nights before moving on. The logic is sound even if the numbers are arbitrary: shorter driving days reduce fatigue, an early arrival gives you daylight to set up and time to fix problems, and staying multiple nights means you spend less of the trip hitching and unhitching. Treat it as a planning default you are free to break, not a rule.
What is the 444 rule for RV camping?
The 4-4-4 rule is the same idea with looser limits: up to about 400 miles per day, arriving by 4 p.m., and staying four nights. Some versions add a fourth element, such as taking a full rest day every fourth day. Like 3-3-3, it is a rule of thumb circulated within the RV community rather than any official recommendation. Longer legs are workable if you have two drivers and an easy route; they become a poor idea on mountain grades, in high wind, or when you are towing a rig you are still getting used to.
What not to forget when RV camping?
The items most often left behind fall into three groups. First, the connection pieces — sewer hose and adapters, drinking-water hose, water pressure regulator, and the right electrical adapter for the pedestal you were assigned. Second, the setup pieces — wheel chocks and levelling blocks, which are easy to leave lying in the grass at the previous site. Third, the safety pieces — working detector batteries, a charged fire extinguisher, a food thermometer, and a restocked first-aid kit. Beyond gear, the two things people most regret forgetting are checking the forecast on the morning of departure and telling someone at home where they are going.
What is the most forgotten item when camping?
There is no authoritative single answer, and any site that gives you a precise statistic is guessing. What comes up most consistently in RV community discussion is the small connector or adapter that makes a system work: the sewer hose fitting, the 30-to-50 amp adapter, or the pressure regulator. Among general camping items, matches or a lighter, a can opener, and towels are perennial. The practical fix is not memorising a list of commonly forgotten things but keeping a fixed "never unpacked" bin — connectors, chocks, gloves, tools, headlamps — that lives in the RV year-round and is only ever restocked, never emptied.